How to Make a Car to Robot AI Video That Actually Transforms
 AI Mecha Transformation Team
A car to robot AI video lives or dies on panel logic. Here is the prompt structure that keeps the paint, the wheels and the headlights of your actual vehicle through a full standing-up transformation, plus the failures to expect.
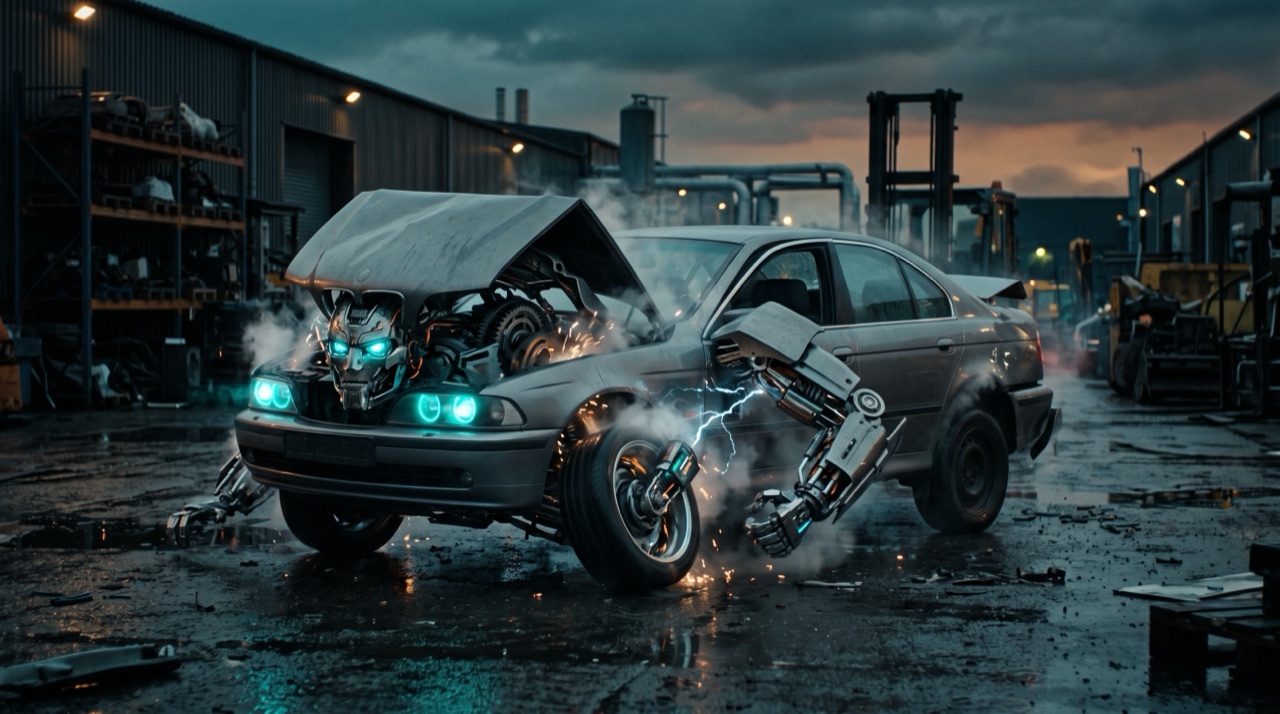
How to Make a Car to Robot AI Video That Actually Transforms
Cars are the hardest subject in this format and the most rewarding when it works. A person transforming into armour is forgiving: plates can close in any order, the face carries the clip, and a viewer accepts almost any assembly. A car transform has to obey panel logic. Doors have to become arms, the roof has to become something, and the wheels have to end up somewhere plausible. Get the logic wrong and the result reads as a car dissolving into a robot, which is a crossfade, not a transformation.
This is the working method: how to prompt a car transformation with one photo, what to name explicitly, and the five failures that show up most often.
What is actually hard about it
| Property | Person → armour | Car → robot | | ---------------- | ---------------------------- | ------------------------------------------------------- | | Identity anchors | Face, hair, skin tone | Paint colour, body shape, wheel design, headlight shape | | Fixed geometry | Arms, legs, torso | Doors, bonnet, roof, four wheels | | Legible mapping | Forearm → gauntlet | Door → arm plate, bonnet → shoulder, roof → head | | Failure mode | Face drift, duplicated limbs | Panels that teleport, wrong car, wheels that vanish |
The mapping is the whole job. A viewer believes the transformation when they can see which part became which part, in order. Ambiguity is what makes it look like a dissolve.
The prompt structure
Four parts, same as every other render, with the car-specific clauses filled in.
- Subject lock. "Keep the car's paint colour, body shape, wheel design and headlight shape exactly as photographed — the same vehicle transformed, not a different machine."
- One action. The car rises and stands. Nothing else. No driving, no fighting, no second car.
- Panel order. Name the sequence: bonnet lifts and folds back into a shoulder pauldron → doors split outward into arm plates → roof rises into a head → wheels tilt into leg joints → the whole body stands upright.
- Style and delivery. One continuous shot, vertical 9:16, wet asphalt, dusk, steam and arc light, no readable badges, no text, no watermark.
A prompt that satisfies all four, ready to paste:
Transform the car in this photo into a robot. One continuous shot, vertical 9:16, no cuts: on a wet industrial lot at dusk the bonnet lifts and folds back into a shoulder pauldron, the front doors split outward into arm plates with visible hinges, the roof rises and folds into a head as the headlights ignite like eyes, the wheels tilt inward and lock into leg joints, and the whole body stands upright while the panels scrape, seat and lock. Keep the paint colour, body shape, wheel design, window shapes and headlight shape exactly as photographed — the same car transformed, not a different machine. One rising action only, no driving, no second vehicle. Steam, sparks and light arcs, cinematic dusk lighting, deep mechanical rumble, no readable badges, no text, no watermark, no extra wheels.
Two details are doing quiet work. "No driving" prevents the model from spending its frames on motion blur, and "no extra wheels" suppresses the classic duplicate-part problem — a car has four wheels, and a model that loses count will hand you five.
本条视频:30 积分 · 每月 6 条为 $39.90(Pro),或每年 80 条为 $319
Step by step
- Photograph the car properly. Three-quarter front view, whole vehicle in frame, nothing overlapping it. A car shot from behind a fence will attach panels to the fence.
- Fix the lighting in the photo, not the prompt. Flat overcast light photographs best. If your only shot is backlit, expect the panels to lose definition.
- Remove readable branding before rendering. Badges become mangled text in generated frames. Either pick a clean angle or accept blurry shapes, and add "no readable badges" to the prompt.
- Render a 480p test. 5 credits at 12 seconds. Check the wheel count and the paint colour first, then the panel order.
- Fix one thing, re-render. If the bonnet-to-shoulder mapping is wrong, describe the hinge. If the roof-to-head mapping is wrong, describe the windscreen folding forward like a visor.
- Render the delivery version. 720p standard is 10 credits; the 1080p default is 30. Longer clips scale linearly from twelve seconds and round up.
- Download the MP4. No watermark, 9:16, private to your account.
Alternative approaches, honestly compared
| Approach | What it is good for | Where it fails | | --------------------------------- | ----------------------------------------------------------- | -------------------------------------------------------------------------- | | Single continuous shot, one photo | The believable transformation; the format viewers recognise | Needs a clean photo and a well-ordered prompt | | Two shots — car, then robot | Faster to get a clean robot figure | It is a cut, and a cut reads as a slideshow, not a transformation | | Text-only prompt, no photo | Roughing out an idea before you choose a vehicle | You lose the car you actually own; the machine is generic | | Photo plus a written scene change | Brand or client work that needs a specific setting | More instructions compete for the same frames; keep the extra lines to one |
If you are producing this for a client rather than for yourself, the brand workflow covers the extra passes that involves.
Five failures, in the order they show up
- Wheels vanish mid-transform. The prompt never said where they go. Fix: "the wheels tilt inward and lock into the leg joints" — give them a destination.
- A fifth wheel appears. Duplicate geometry, usually from a wide shot where the model cannot resolve the axles. Fix: shoot closer, and say "four wheels, no extra wheels".
- The car changes colour or model. Anchoring lost. Fix: name the paint colour and the headlight shape in the identity clause, and make sure the whole car is in frame.
- Panels teleport instead of folding. The prompt described the result, not the motion. Fix: name the hinge and the direction — "the doors split outward", "the bonnet folds back".
- A dissolve with a sweep effect. The prompt asked for too much, so the model bridged the gap with a wipe. Fix: cut the action list to the rise, and drop any camera movement.
Related reading: the general failure checklist is written for people renders but every entry applies here, and the prompt library has the vocabulary blocks for hinges, seams and locking plates.
Credits, grants and what a test costs
| What you render | Length | Credits | | ---------------------- | ------ | ------- | | 480p test | 12s | 5 | | 720p standard | 12s | 10 | | 1080p default delivery | 12s | 30 |
A Google sign-in grants 30 credits once — one default render, or six 480p tests, which is realistically what a car transform needs before it is right. Email sign-up builds the balance from daily check-ins instead: 10, 20, 30, then 10 for each of the next four days, one every 24 hours. A failed render refunds its credits to the balance it came from, so a technical failure does not eat the budget. Current tiers are on pricing.
FAQ
Can I transform a real car I do not own? You can render any photo you upload. Whether you should is a rights question about the photograph and the vehicle's branding, not a technical one. For commercial work, start from a photo you have the right to use.
Do I need multiple angles? No. One photo drives the render. A good three-quarter view is worth more than three mediocre angles, since the pipeline is single-photo by design.
Will the model keep the exact model of car? It keeps what it can see: paint, proportions, wheel design, headlight shape, window line. Badges and fine trim will not survive, so do not build the clip around them.
Why does my robot end up standing in a different place? Because the prompt asked for movement across a lot. Keep the car where it is and let the transformation do the travelling — "the whole body stands upright in place, the background stays fixed".
How long is the clip? Twelve seconds by default, which is the length these presets are written for. One panel sequence fits comfortably. If you want a second beat, render a second clip rather than overloading one prompt.
Is the result watermarked? No. Every render is a clean 9:16 MP4, private to your account, whether it was paid for with a plan or with a check-in credit.
Upload the car photo on the front page and budget two or three 480p passes before you commit to the delivery render.