Best AI Mecha Transformation Video Tactics for Brand Ad Creative
 AI Mecha Transformation Team
Using AI mecha transformation video for brand ad creative: how to keep a product readable through an armour assembly, why the product should be the trigger object, and the brief you should hand the render.
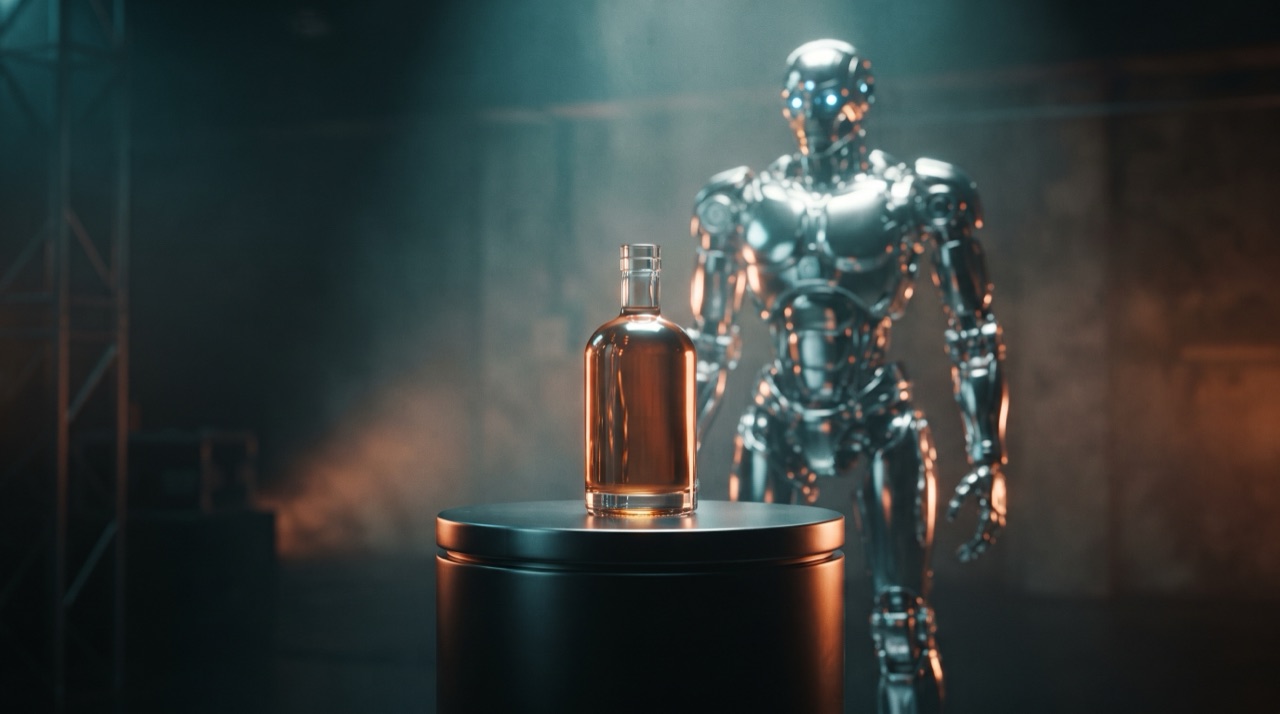
Best AI Mecha Transformation Video Tactics for Brand Ad Creative
The mecha transformation format transfers to advertising better than most trends, for one structural reason: it is a reveal format. Something ordinary becomes something armoured, in a single continuous shot, with sound. That is the same shape as a product reveal — before, mechanism, after — and it needs no dialogue, which is why it survives being watched on mute in a feed.
The trap is treating it as decoration. A brand clip where the armour is the point and the product is a prop in the background is a nice render that sells nothing. This page is how to build the brief so the product stays readable through the assembly.
Rule one: the product is the trigger
The trigger object is what the subject touches so the armour has a reason to appear. Make that object the product.
| Trigger | What the viewer remembers | Works when | | ------------------------------------------------------- | ------------------------- | -------------------------------------------------- | | A carrot | The joke | You are making a trend-native post, not an ad | | The product, held to the chest | The product | You have a physical object with a clean silhouette | | The product on a pedestal, subject armours up beside it | Both, cleanly | You need the pack shot readable, not held | | A phone screen showing the product | The product, indirectly | Your product is digital |
Two practical constraints worth knowing before you write the brief:
- The trigger object has to be small enough for a hand to clear the frame, because the forearm and wrist are where the first plates close. A large held object blocks the assembly.
- A held object will be partially occluded by the gauntlet as the plates close over the hand. If the label must be readable at the end, put the product on a pedestal and let the suit assemble beside it — the "guardian" composition — instead of in the hand.
Rule two: lock the product's visual identity in the prompt
An unconstrained render will drift a plain bottle into a generic bottle, change a colour, or invent a label. The identity clause that holds a person's face has a direct product equivalent:
The product sits on a low pedestal in the centre of frame, completely unchanged: same shape, same proportions, same colour, same cap design, same label position, with no text rendered on it and no packaging changes. The armour assembles beside and behind it without ever covering the product.
Say explicitly that nothing covers the product. Models cheerfully place a pauldron over your hero object at the exact frame where the reveal lands.
If the label must show, render it as an overlay in your editor rather than asking the video model to write text. Generated lettering is unreliable, and a warped logo is worse than no logo.
A brief skeleton
Hand this to whoever writes the prompt — a person or you, at 11pm.
- Subject lock. "Keep the person's face, hair, skin tone, build and clothing colour exactly as photographed."
- Product lock. The product clause above, including "no text rendered on the product".
- Trigger. The product as the object of contact, or the pedestal composition if the label must survive.
- One action. The armour assembling around the subject. Add nothing else — no walking, no pointing, no second character.
- Assembly order. Plates first, chest plate second, helmet or visor last. The visor is your reveal beat; land it late.
- Delivery. One continuous shot, vertical 9:16, lighting direction stated, palette stated as brand-adjacent but generic (name colours, not brands).
Two things the brief must never contain: a named film or game property, and a celebrity likeness. Both pull the render toward something you cannot use, and both are legal problems rather than creative choices.
このクリップ:30クレジット · 月6本で$39.90(Pro)、または年80本で$319
Production workflow
- Shoot or select the product still. Even light, plain background, whole product visible, no hands in frame.
- Photograph the talent. Front-facing, torso in frame, uncluttered background — the photo checklist applies exactly as it does for personal clips.
- Draft the prompt from the skeleton. One preset plus your product clause is faster than a blank box.
- Render 480p tests until the product survives. 5 credits per test at twelve seconds. Verify the product is unchanged in the last frame, not just the first.
- Fix one variable per iteration. Product placement, then lighting, then assembly speed. Never two at once.
- Render the delivery version. 720p standard is 10 credits, 1080p default is 30. Linear from the twelve-second rate for longer clips.
- Finish in the editor. Add the brand lockup, the legal line and any readable pack text as overlay. Keep the generated mechanical audio; mix music underneath if you need a bed.
What it costs to produce a campaign set
| Set | Renders | Credits at 1080p · 12s each | | ---------------------------------- | ---------------- | --------------------------- | | One hero clip | 1 | 30 | | Hero plus two variants for testing | 3 | 90 | | Six hook variants, one product | 6 | 180 | | Plus three test passes per variant | 18 tests at 480p | 90 |
Testing is what makes the volume add up, which is the argument for rendering tests at 480p rather than at delivery resolution. Credits come from a monthly or yearly plan for recurring output, or a one-time pack for a single campaign, and packs never expire while plan credits last their billing period. Current tiers and per-clip economics are on pricing.
Rights and honest claims
Three things worth writing into the brief explicitly, because they are the difference between a campaign and a complaint:
- This tool is independent. It is not affiliated with any film, game or franchise, and it ships no branded presets. Do not ask it for a specific copyrighted character.
- Rights in the source photo. You need the right to use the talent's photo and the product image. Generating the clip does not create those rights.
- No invented performance claims. Do not put a fabricated statistic on the clip — no fake "X% more engagement", no invented sales figures, no fake count of users. The clip is the creative; the numbers are the client's, and they have to be theirs and true.
Check the terms of service for the formal position on commercial use rather than relying on a blog summary.
FAQ
Can I use this for client work? That is what the format is for. Get the source-photo rights, keep named properties out of the prompt, check the terms, and treat the render as raw footage rather than a finished asset.
How do I keep the brand's colour in the armour? Name the colours in the style clause — "charcoal and oxidised copper" — and lock them early in the prompt. Naming a brand gets you a random approximation of it, and possibly a wrong logo.
Can the model render my logo? Do not ask it to. Generated lettering warps. Render the clip clean and overlay the real lockup in the edit.
Should the product be held or on a pedestal? Pedestal if the packaging must be readable at the end; held if the trigger moment matters more than the label. The car and pet guides are useful references for non-human subjects, which often suit product builds better than people do.
How many variants should I render for paid social? Enough to test more than one hook. Three to six variants at 1080p is 90 to 180 credits; run them alongside 480p test passes first so you are not paying delivery prices to discover a bad composition.
Is there a watermark on commercial renders? No. Every render is watermark-free at every tier, with no paid unlock to remove anything.
How long is the clip? Twelve seconds by default — one reveal, one beat, sized for vertical feeds. See the vertical delivery guide for safe areas and caption placement.
Start the campaign from the studio and keep every test pass at 480p until the product survives the assembly unchanged.